Connecting an ASUS router to a modem is essential to ensuring reliable internet access when setting up your home network. It might seem daunting if you’re doing it for the first time, but don’t worry—this guide is here to help! In this detailed article, we’ll walk you through every step How To Connect Asus Router To Modem and get your internet connection up and running.
We’ll cover the hardware setup, software configuration, and everything else. The steps remain largely the same whether you’re using a cable or DSL modem. So, let’s connect your ASUS router to the modem for seamless internet access.

What You Need to Get Started
Before diving into the actual setup, it’s important to gather everything you’ll need.Here’s a checklist to help you prepare:
- ASUS Router: Any ASUS model (e.g., RT-AX88U, RT-AC86U, etc.)
- Modem: This can be a cable modem (for cable internet) or a DSL modem (for phone-line internet)
- Ethernet Cables: These are used to connect the router to the modem and potentially to your computer
- Power Adapters: Ensure both the modem and router have their respective power adapters
Having all of these components ready will make the process smoother.
Step 1: Unboxing and Checking the Components
Once you’ve learned How to connect Asus router to modem, the first step is to unbox both devices and ensure all components are included.
- Router: Should come with the router itself, a power adapter, one or more Ethernet cables, and a quick-start guide.
- Modem: This typically includes the modem, its power adapter, and possibly a coaxial cable (for cable modems) or a phone cable (for DSL modems).
Double-check that everything matches what’s listed in the packaging. Missing items can delay the process, so make sure you have everything before proceeding.
Step 2:How To Connect Router To Modem
Your modem is the device that receives the internet signal from your ISP (Internet Service Provider). To get started:
- Connect the modem to your ISP connection:
- If you have a cable modem, connect the coaxial cable from the wall jack to the back of the modem.
- If you have a DSL modem, connect the phone line from the phone jack to the modem.
- Turn on the modem by plugging in the power adapter.
- Wait for the modem to fully boot up. This can take a few minutes. The indicator lights will stabilize once it’s connected to the ISP.
If your modem isn’t connecting, make sure the cables are properly connected and that the modem is compatible with your internet service.
Step 3: Connecting the ASUS Router to the Modem
Now that your modem is ready, it’s time to connect your ASUS router to it:
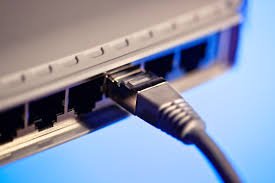
- Take an Ethernet cable and plug one end into the WAN port of the ASUS router. The WAN port is usually blue and is labeled as “WAN.”
- Plug the other end of the Ethernet cable into the LAN port of your modem.
- Verify that both devices are turned on and operating as intended. The LED lights on both the modem and router should indicate a connection.
Step 4: Powering Up the ASUS Router
Next, plug in the power adapter for your ASUS router and turn it on.Observe the LED indication lights:
- The Power LED should be solid.
- The WAN LED should light up, showing a successful connection between the router and the modem.
If these lights are blinking or remain off, double-check the Ethernet connection between the router and modem, and ensure the power cable is securely plugged in.
Step 5: Accessing the ASUS Router’s Admin Panel
To configure your ASUS router, you need to access its admin panel:
- Connect your computer or smartphone to the router via Wi-Fi (default SSID will be on the back of the router) or by using an Ethernet cable to connect directly to one of the LAN ports on the router.
- Open a web browser and enter 192.168.1.1 or router.asus.com into the address bar.
- You’ll be prompted to log in. Use the default login credentials (found on the router label) to access the admin panel.
Step 6: Configuring the Router Settings
Once you’re inside the ASUS router’s admin interface, you can begin configuring its settings:
- Internet Setup: The router will detect your internet connection type automatically (Dynamic IP, PPPoE, or Static IP). To configure your internet connection, adhere to the on-screen directions.
- Wireless Settings: Set up your Wi-Fi network by choosing an SSID (network name) and a secure password. Make sure you use WPA3 encryption if available for the highest security.
Step 7: Checking the Internet Connection
Once you’ve completed the configuration, it’s time to test your internet connection:
- Open a web browser and try accessing a website.You have a functional internet connection if the website loads.
- If the connection isn’t working, reboot both the modem and router and try again. If the issue persists, revisit the settings to ensure everything is configured correctly.
Step 8: Securing Your ASUS Router
To protect your network, change the default login credentials for the router’s admin panel:
- Go to the Administration section in the settings.
- Change both the username and password to something unique and secure.
- Enable WPA3 encryption for your Wi-Fi network if supported.
Step 9: Updating Firmware
Keeping your router’s firmware up to date is crucial for performance and security:
- In the admin panel, look for the Firmware Upgrade option under Administration.
- Check if a new update is available, and install it if prompted.
Step 10: Setting Up Additional Features (Optional)
ASUS routers offer a variety of advanced features:
- Guest Network: Create a separate network for visitors, keeping your main network secure.
- Parental Controls: Restrict which devices can access the internet.
- QoS (Quality of Service): Prioritize traffic for specific devices or applications, like gaming or streaming.
Step 11: Placing the Router for Best Coverage
For optimal Wi-Fi coverage, place the router in a central location, elevated off the floor, and away from thick walls or electronic devices that may cause interference. If you have a large home, consider using ASUS AiMesh to extend the network’s range with multiple routers.
Common Issues and Troubleshooting
Here are some typical problems you may encounter:
- No Internet Connection: Check if the Ethernet cable is securely connected between the modem and router. Reboot both devices.
- Slow Wi-Fi: Ensure you’re not too far from the router, and try changing the Wi-Fi channel to avoid interference.
- Forgotten Login Credentials: You can reset the router to factory settings by pressing the reset button on the back for 10 seconds.
Conclusion
Setting up your ASUS router with a modem is straightforward. Once it’s done, you’ll enjoy a fast and stable internet connection. Following the steps outlined above, you’re all set to enjoy smooth and secure browsing, from connecting the hardware to configuring the software. Regularly updating your router’s firmware and using strong security measures will help keep your network safe and efficient.
FAQs
- Can I use any modem with an ASUS router?
- Yes, as long as the modem is compatible with your ISP, it should work with any ASUS router.
- How can I return my ASUS router to its original configuration?
- Press and hold the reset button on the back of the router for about 10 seconds until the lights start blinking.
- What if my modem doesn’t connect to the internet?
- Reboot the modem, check the cables, and ensure your ISP connection is active.
- Can I use the same SSID for both 2.4 GHz and 5 GHz networks?
- Yes, you can, but it’s recommended to differentiate them for better device management.
- How often should I update my router’s firmware?
- It’s a good idea to check for updates at least once every few months to ensure optimal security and performance.

